

I like a bargain, but easy DIY car and home maintenance for retirees should not turn my driveway into a full-time garage. I prefer a small job, clear instructions, and tools that don’t require their own parking space.
PSI means pounds per square inch, the unit used to measure tire pressure. The $150 in the title is a hook, not a promise: shop costs vary, and these jobs do not guarantee savings.
You can learn to check engine oil and tire pressure, replace wiper blades and washer fluid, change car air filters, and replace a home HVAC filter. These are practical upkeep tasks, not a pledge to fix every problem yourself.
Pick one task that suits your comfort and mobility. You do not need to become a pit-crew mechanic, and your knees are not required to audition for the role.
Key Takeaways
- Choose low-strain work that you can reach safely.
- Use the owner’s manual for vehicle-specific steps and timing.
- Check tire pressure with the vehicle’s recommended PSI.
- Match replacement parts to your car or home system.
- Stop when a task feels unsafe or points to a larger repair.
So which jobs make sense to do at home, and which ones can stay at the shop?
What Can You Safely Handle at Home?
A simple job gets less simple when the rag is inside, the light is missing, and the tools have wandered off. Start small: many maintenance tasks need little reach, no heavy lifting, and no work beneath a raised vehicle.
Stop if pain, dizziness, or poor access makes the task unsafe. Set up on firm, level ground with good light, and choose a standing position that feels comfortable.
Choose work you can reach without strain, and stop if your body or the setup says no.
Keep four basics nearby before you begin. The right parts matter as much as the tools, because a mismatched filter or blade wastes time and patience.
- Tire-pressure gauge
- Clean rag
- Funnel
- Correct replacement filter or wiper blades
Keep the Job Light and Reachable
These jobs don’t require lifting a wheel or sliding under a vehicle. If reaching into the engine bay feels awkward, do not stretch across hot or moving parts.
A cool-engine visual check can still reveal when a professional should take a look. Check hoses for cracks, a crunchy feel, or seepage, and belts for fraying or a shiny, glazed surface.
Most batteries sit under the hood, but the owner’s manual shows the location if they don’t. White or blue buildup at the terminals can point to acid leakage.
Let the Owner’s Manual Set the Rules
Latex gloves and a wire brush are used to clean terminal buildup, but battery work needs care. Never let a wrench touch both terminals at once, and seek help if the battery looks damaged or leaks.
Squealing or vibration while the engine runs deserves a professional inspection. Those clues can point to more than routine upkeep, even if the car still starts.
Gather your tools, find the owner’s manual, and choose a routine you can repeat without rushing. That gives you a sensible start and the right reference before any job.
How Does Easy DIY Car and Home Maintenance for Retirees Fit Into a Simple Routine?
A useful routine is a handful of repeatable checks and simple swaps, not a second career. Start with jobs you can do safely, then use the owner’s manual to confirm the details.
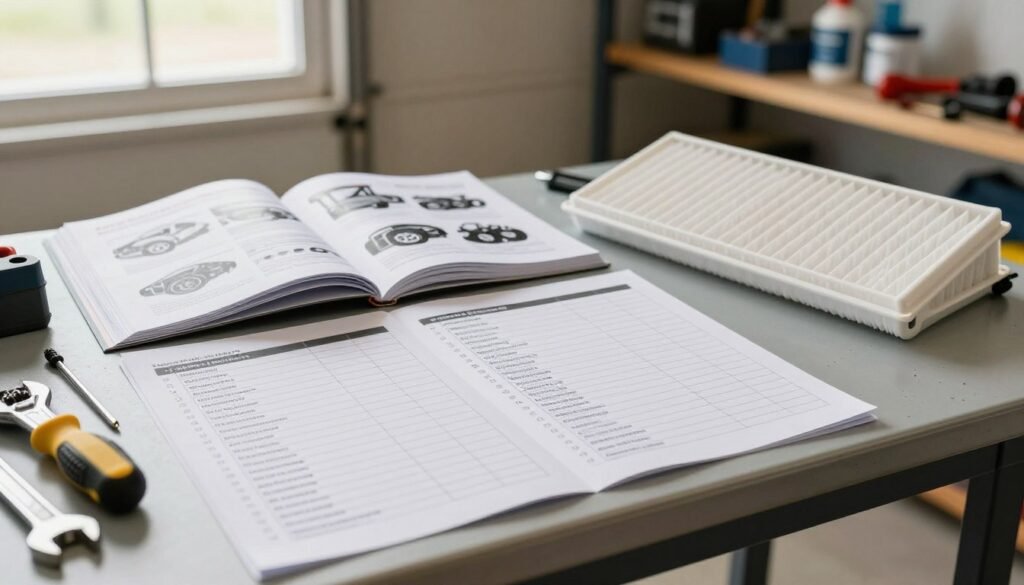
This approach to easy diy car and home maintenance for retirees can save money in some cases, but no set amount is promised. A few minutes with the manual can prevent you from buying a part that doesn’t fit.
Use this overview to find the right item and the right instructions. It is a repeatable upkeep routine, not a substitute for repairs or a diagnosis.
| Featured task Item | m or part to have ready Where | e to confirm the right instruction |
|---|---|---|
| Oil level | Clean rag and dipstick | Owner’s manual |
| Tire pressure | Pressure gauge | Driver’s-door placard or owner’s manual |
| Wiper blades and washer fluid | Vehicle-matched blades and climate-appropriate washer fluid | Blade package or vehicle fit guide, plus owner’s manual for fluid guidance |
| Car air filters | Engine air filter or cabin air filter | Owner’s manual and filter airflow arrow |
| Home HVAC filter | Correctly sized replacement filter | Existing filter size or HVAC unit instructions |
Car maintenance works best when it fits real life. You might check a car before a planned drive or inspect a home filter while changing another household reminder.
A simple routine can help you notice changes early, without turning every weekend into a repair project. Choose one task first, and let comfort and clear instructions guide the next step.
Oil is a good first driveway check because a dipstick gives a direct view of the engine’s oil level. Let’s start there.
How Do You Check Engine Oil Without Changing It?
Checking the dipstick is a quick way to spot an oil-level problem before it grows. A level reading matters: park on level ground, shut off the engine, and follow your vehicle’s owner’s manual.
Check oil monthly if you drive regularly, and more often if your vehicle has over 100,000 miles. This is a fluid check, not an oil change or a repair.
Use this four-step check when the engine is off and cool. Some vehicles have specific instructions, so the manual gets the final say.
- Park on level ground and switch off the engine.
- Locate and remove the dipstick.
- Wipe it clean, then reinsert it fully.
- Remove it again and compare the oil level with the two marks.
Read the Dipstick on Level Ground
The oil should sit between the two marks. If the reading is low, add only the oil type listed in the owner’s manual, using a funnel to avoid spills.
Add a little at a time and check the dipstick again. Guessing at the amount is a fine way to make a small task more exciting than it needs to be.
If the dipstick shows no oil, add the specified oil until the level is in range and arrange a prompt inspection. The engine needs attention, even if the car seems to run normally.
Know When a Low or Odd Reading Needs Attention
Grainy or milky oil warrants a trip to the repair shop. It is not a routine reading to explain away with a shrug and a paper towel.
You generally should not go two years without changing oil. The right interval depends on the vehicle and the manufacturer’s instructions, so don’t use a two-year schedule by default.
Changing oil at home may not save much money, and it does not offer the same chance for a broader inspection. A check engine warning or odd oil reading deserves attention beyond this basic check.
Once the oil is accounted for, turn to the air supporting the vehicle on the road: its tires.
How Can You Check Tire Pressure the Right Way?
A tire can show a higher reading after a drive than it does the next morning. Cold tires give a more useful check because heat from driving expands the air inside.
Check all four tires at least once a month, using the vehicle’s recommended PSI. Find that number on the driver’s-door information sticker or in the owner’s manual, not on the tire sidewall.
A built-in pressure sensor can alert you to a problem, but it does not replace a monthly gauge check. A gauge can show the actual tire pressure when the car has been parked for several hours.
Use this short list to check tire pressure and spot visible damage:
- Measure each tire when cold, ideally in the morning.
- Compare the reading with the vehicle placard or owner’s manual.
- Add air in small amounts, then recheck with the gauge.
- Look for uneven tread wear, cuts, or bulges.
Measure Pressure When the Tires Are Cold
Use the recommended PSI for your vehicle, not the maximum pressure printed on the tire sidewall. That sidewall figure is not the target for your car.
If a tire reads low, a tire inflator can add air. Add it in small amounts, check again, and stop when you reach the recommended pressure.
Underinflation can make a tire unsafe, wear its tread unevenly, and reduce vehicle efficiency. It is a small check with big effects on the road.
Look at the Tread and Sidewalls Too
Look across each tire’s tread and sidewall, not just the spot facing you. A bulge, cut, uneven wear, or pressure that keeps dropping calls for professional attention.
The tire may need more than air, and repeated top-ups can hide a growing problem. Do not keep driving on a tire with visible damage without getting it assessed.
With the tires checked, move to another small item that helps you see and be seen in bad weather: the wiper blades.
When Should You Replace Wiper Blades and Washer Fluid?
The forecast can look fine until road spray hits, and then old blades audition for a horror movie. Streaks or poor wiping are good reasons to replace wiper blades.
Wiper blades commonly need replacement every 6 to 12 months, though wear can show sooner. Match the blade size and vehicle fit before buying parts.
Many vehicles use two different blade sizes, so check each one. Follow the package instructions rather than assuming both sides match.
Match the Blades to the Vehicle
Put a towel over the windshield before lifting a wiper arm. If the arm drops, the towel helps protect the glass from a hard strike.
Lift the arm carefully and follow the blade package steps to remove the old blade and fit the new one. If the part resists, check its fit instead of forcing it.
A cloudy headlight can also limit visibility. Avoid abrasive household hacks; use a headlight restoration product or seek a professional assessment.
Refill Washer Fluid for Your Climate
Choose washer fluid that suits your local climate. Plain water can freeze, expand, and damage the reservoir when temperatures drop.
Many ordinary vehicle bulbs can be replaced with basic tools, but a faulty LED light is different. A professional should diagnose a malfunctioning LED system.
Fresh blades and washer fluid help with visibility; next, check the filters that keep air moving through the car.
Can You Replace Your Car’s Air Filters Yourself?
Many car filters are straightforward swaps once you identify the right filter. The engine air filter and cabin air filter serve different jobs and sit in different places.
Check the owner’s manual for the filter location and interval, then match the part to your vehicle. Stop if access requires force or steps beyond the instructions.
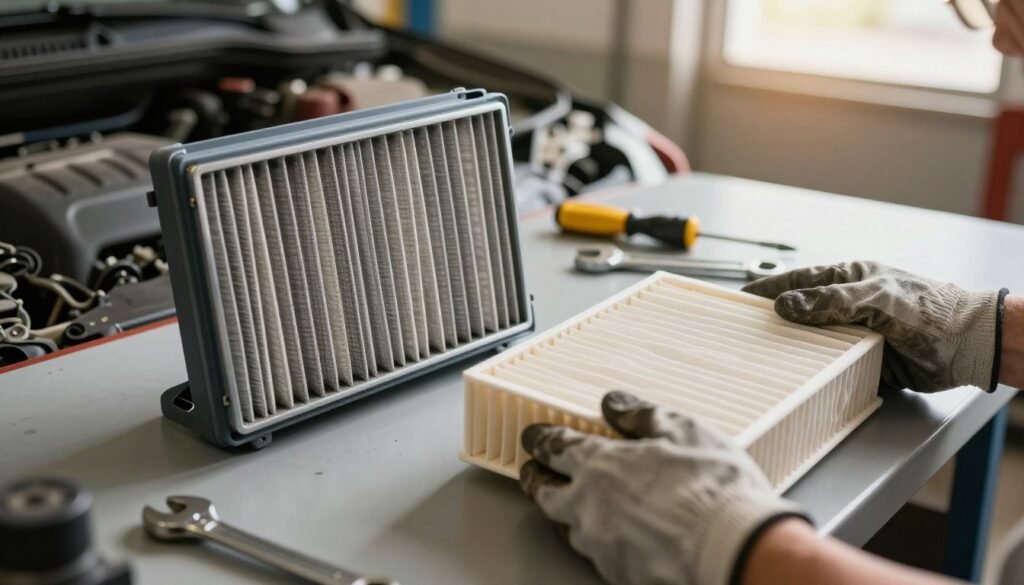
Swap the Engine Air Filter
The engine air filter usually needs replacing every 20,000 to 30,000 miles, but your manual sets the interval. Dusty conditions may also warrant an earlier check.
The engine air filter box is commonly under the hood and held by clips or screws. Open it as directed, note how the old filter sits, and place the replacement in the same orientation.
The filter should sit flat in its box. If the cover will not close as directed, check the part and placement instead of pressing harder.
Find and Orient the Cabin Air Filter
Many vehicles made after 2002 have a cabin air filter. It is often behind the glove box, but the owner’s manual gives the location and replacement interval.
Allergies or recent exposure to wildfire smoke can be reasons to check the cabin air filter sooner. Match the filter to the vehicle before buying it.
Follow the compartment’s direction for the airflow arrow on the new filter. The arrow must match that direction, not simply point toward whatever side looks tidy.
If access requires force or disassembly beyond the manual’s steps, stop. The car’s filters are one thing; a home HVAC filter is a similar, low-strain task.
What Home HVAC Filter Can You Change Yourself?
A dusty filter pulled from the HVAC unit is a quiet reminder that the house has maintenance needs too. This task can be simple when the replacement fits and the system is off.
A common rule is to check a home HVAC filter every 1 to 3 months. The right replacement interval varies with filter type, system instructions, dust, pets, and how often the system runs.
Check the existing filter for its size, or look at the HVAC unit instructions. Buy a correctly sized filter instead of guessing.
Check the Filter Size and Direction
Turn off the system before opening the filter access panel. Note the airflow arrow on the old filter, then remove it without bending the frame.
Slide in the replacement, keeping the arrow facing the same direction. The filter should fit without force, and the access panel should close securely.
If the filter will not fit or the panel will not close, stop and check the equipment instructions. Jamming the part can damage the filter or leave the system open.
Set a Reminder for the Next Check
Write the date on the filter edge or record it in a calendar. A reminder is more reliable than hoping your memory notices a dusty corner months later.
Use the system instructions to set the next check, then adjust for the home’s dust, pets, and use. A common starting point is 1 to 3 months, not a fixed rule for every filter.
This home maintenance task may save money when the right filter keeps the system working as intended, but it doesn’t guarantee lower bills.
Simple filter swaps have clear limits. Next, consider when a problem calls for a professional.
When Should You Stop DIY and Call a Mechanic?
A warning light, fluid leak, or change in steering or braking is not a good time for driveway experiments. Stop driving and arrange professional help for serious warning signs.
Use these signs to decide when to pull over, call roadside assistance, or arrange a tow. A car that changes how it drives may not be safe to keep moving.
| Warning sign: What | t to do | Why | y it needs prompt attention |
|---|---|---|
| Flashing check-engine light or changed drivability | Pull over and call roadside assistance | The vehicle may not be safe to keep driving |
| Oil-pressure warning | Stop driving and arrange professional help | Continued operation can damage the engine |
| Fluid leak, smoke, or steam | Stop and get professional help | A leak or overheating can signal a serious fault |
| Steering difficulty, unusually low brake pedal, grinding, or knocking | Stop driving and arrange a tow or professional help | Control problems or internal faults can cause harm or more damage |
Stop driving for an oil-pressure warning, a leak, smoke, steam, steering trouble, or a change in braking.
A professional is the right call for brake or transmission repairs and services. Those jobs go beyond routine maintenance and can affect how the vehicle stops or shifts.
Battery-terminal cleaning also needs care. Use gloves, never bridge the terminals with a wrench, and seek help if the battery looks damaged or leaks.
Some manufacturers advise against jump-starting, so check the owner’s manual before attempting it. If the instructions warn against it, do not try to jump-start the vehicle.
Choose one simple task that suits your comfort, and leave serious symptoms to a professional. That is good judgment, not a surrender to the toolbox.
Conclusion
Nobody needs to rebuild an engine to feel more in control. One suitable task at a time can help you stay familiar with your car and home system.
The owner’s manual lists vehicle-specific parts and intervals, so use it before you start. Next, choose one task, gather the right item, and read the instructions first.
That small bit of maintenance can make the next check feel less mysterious. A small win counts, even if your toolbox remains mostly decorative.